Flutter Navigator 2.0 for mobile dev: Transitions
This article is part of a series aiming at making you a master of Navigator 2.0 while showing you that it is not as hard as people think. The other articles of this series are:
- Flutter Navigator 2.0: 101 for mobile dev: Were to start if you have no idea what navigator 2.0 is.
- Flutter Navigator 2.0 for mobile dev: Nested navigators basics: How to nest the navigators, and the fix needed to avoid that they ruin your animations
- Flutter Navigator 2.0 for mobile dev: Bloc state management integration: How to use navigator 2.0 and the bloc library
- Flutter Navigator 2.0 for web dev: Url handling: The basics of URL handling.
- Flutter web: URL handling made simple with simple_url_handler: How to use the simple_url_handler package to easily manage the url in flutter web.
- Flutter web: A complete example using simple_url_handler: A complete example, using everything seen above, to build the routing and url handling of a more complete app.

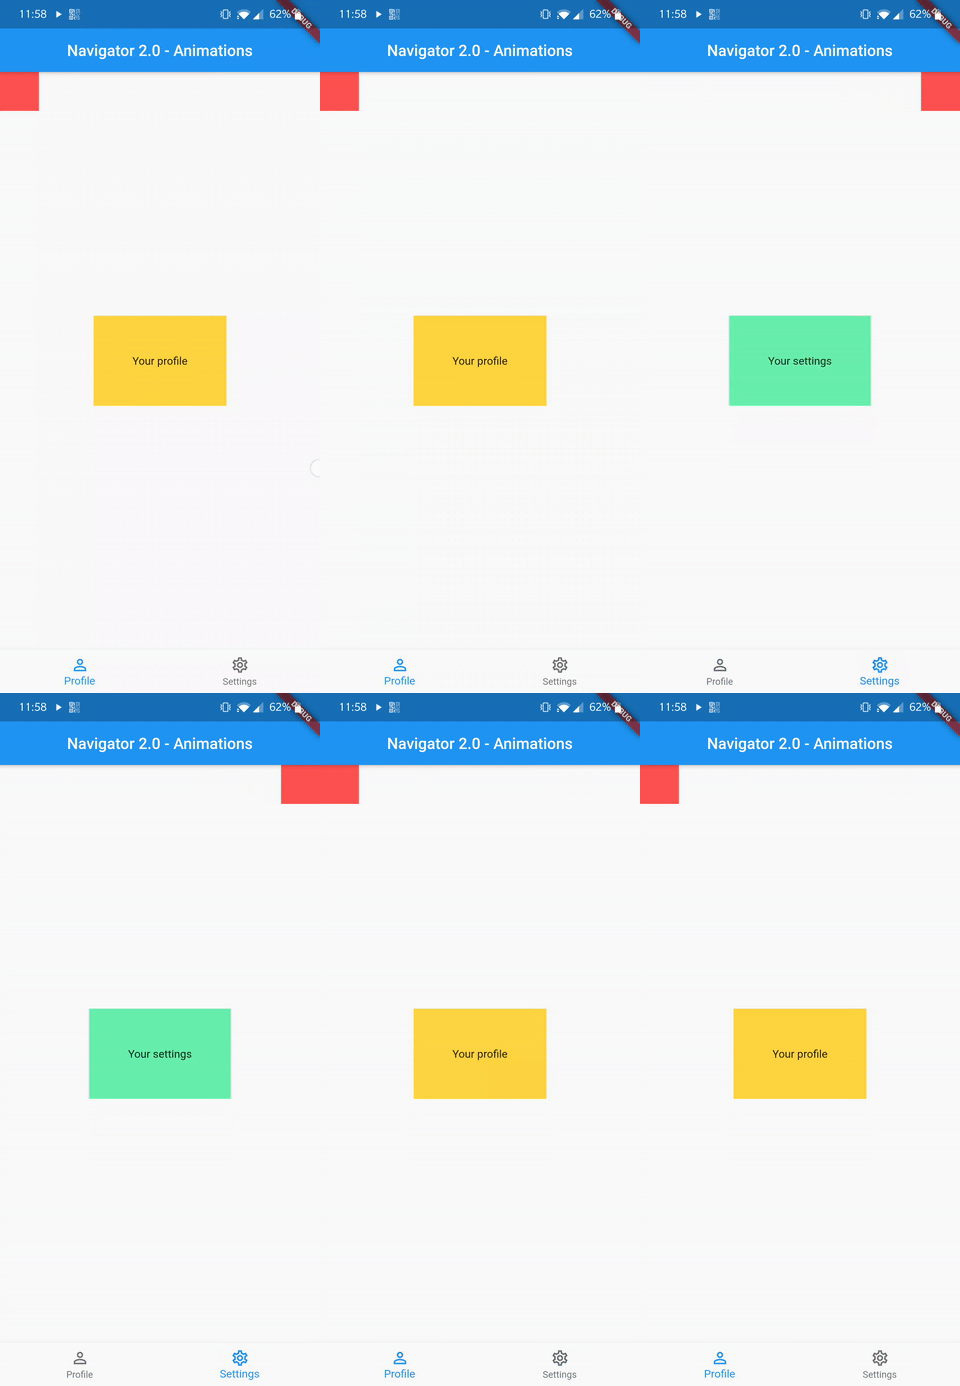
What are we going to build?
The entire code can be found at the end of this article

Note that this article is not about the basics of Navigator 2.0. If you don’t know how to use them, I would advise to look at my article Flutter Navigator 2.0: 101 for mobile dev.
Also note that my implementation does not take into account the URL for the web so this would need extra work to implement.
How to transition between routes?
Transition in flutter are done in two ways:
- Hero animations (our red square)
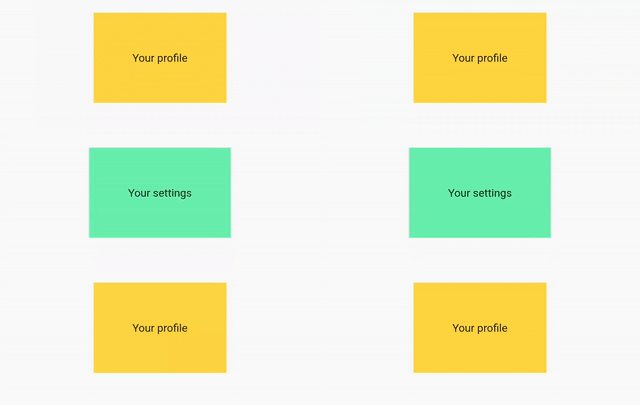
- PageRouteBuilder transitions (our centered text)
1. Hero animations

To use hero animation, use the Hero widget having the same tag attribute to encapsulate the widget that is common to your two screen and which you want to animate when transitioning.
Important: Their is a known issue where an hero animation won’t by fired. An easy (but needed) fix for this is to pass a HeroController to your Navigator observers attribute:
When this is setup you can use your hero like you would normally do.
In the profile part we have:
And in the settings:
When navigating between the two, we can see the square smoothly going from left to right and vise versa !

2. PageRouteBuilder transitions

Those transitions take advantage of the page object that all Navigator’s pages attribute takes. Indeed, if you create a custom class which extends Pages , you can create any transition behavior you want.
The setting widget is wrap in the default MaterialPage which makes the settings appear from the bottom:
But as we said, we can create our own custom Page which will enable us to customize our transition. Here we create a fade transition:
This is only one example of PageRouteBuilder animation but many can be made, you can find some online in some really good articles like Page transitions in Flutter.

Note that for nested navigator, this gets broken. To fix this you should use a global variable to store you nested navigator key:
Full code
Not prettified for easy copy/paste:
import 'package:flutter/material.dart';

main() {
  runApp(MyApp());
}

class MyApp extends StatelessWidget {
  @override
  Widget build(BuildContext context) {
    return MaterialApp(
      home: Router(
        routerDelegate: MyRouterDelegate(),
      ),
    );
  }
}

class MyRouterDelegate extends RouterDelegate
    with ChangeNotifier, PopNavigatorRouterDelegateMixin {
  int selectedIndex = 0;
  final GlobalKey<NavigatorState> navigatorKey;

  MyRouterDelegate() : navigatorKey = GlobalKey<NavigatorState>();

  @override
  Widget build(BuildContext context) {
    return Scaffold(
      appBar: AppBar(
        centerTitle: true,
        title: Text(
          'Navigator 2.0 - Animations',
        ),
      ),
      bottomNavigationBar: BottomNavigationBar(
        currentIndex: selectedIndex,
        items: [
          BottomNavigationBarItem(icon: Icon(Icons.person_outline), label: 'Profile'),
          BottomNavigationBarItem(icon: Icon(Icons.settings_outlined), label: 'Settings'),
        ],
        onTap: onNewIndexSelected,
      ),
      body: Navigator(
        key: navigatorKey,
        observers: [HeroController()], // Important to ensure that hero animations are displayed
        pages: [
          if (selectedIndex == 0)
            MyPage(
              key: ValueKey('ProfilePage'),
              child: ProfileWidget(
                onPressed: () {},
              ),
            ),
          if (selectedIndex == 1)
            MaterialPage(
              key: ValueKey('NestedNavigatorPage'),
              child: SettingWidget(),
            ),
        ],
        onPopPage: (route, result) {
          print('onPopPage NestedRouterDelegate');
          return false;
        },
      ),
    );
  }

  // We don't use named navigation so we don't use this
  @override
  Future<void> setNewRoutePath(configuration) async => null;

  void onNewIndexSelected(int value) {
    selectedIndex = value;
    notifyListeners();
  }
}

class ProfileWidget extends StatelessWidget {
  final VoidCallback onPressed;

  ProfileWidget({@required this.onPressed}) : super();

  @override
  Widget build(BuildContext context) {
    return Stack(
      children: [
        Positioned(
          left: 0,
          child: Hero(
            tag: 'redSquare',
            child: Container(
              height: 50,
              width: 50,
              color: Colors.redAccent,
            ),
          ),
        ),
        Center(
          child: Container(
            padding: EdgeInsets.all(50.0),
            color: Colors.amberAccent,
            child: Text('Your profile'),
          ),
        ),
      ],
    );
  }
}

class SettingWidget extends StatelessWidget {
  @override
  Widget build(BuildContext context) {
    return Stack(
      children: [
        Positioned(
          right: 0,
          child: Hero(
            tag: 'redSquare',
            child: Container(
              height: 50,
              width: 50,
              color: Colors.redAccent,
            ),
          ),
        ),
        Center(
          child: Container(
            padding: EdgeInsets.all(50.0),
            color: Colors.greenAccent,
            child: Text(
              'Your settings',
            ),
          ),
        ),
      ],
    );
  }
}

class MyPage extends Page {
  final Widget child;

  MyPage({@required this.child, LocalKey key}) : super(key: key);

  @override
  Route createRoute(BuildContext context) {
    return PageRouteBuilder(
      settings: this,
      pageBuilder: (BuildContext context, Animation<double> animation,
          Animation<double> secondaryAnimation) {
        return FadeTransition(
          opacity: animation,
          child: child,
        );
      },
    );
  }
}